We've been in the house for over two months and we are still putting in curtains and laying floorboards. Things just take time and since we are doing it all ourselves (with help from family and friends) things take extra long. We haven't taken much time off either. It was just the time after handover when Will had taken a bit of time off work.
He's also off work now as he's had a health scare with his eye having a burst blood vessel or something like that causing a pretty much blindness in one eye. He had surgery last week and he's getting his vision back in that eye so majority of the crisis has been resolved.
Anyway that's meant even more of a slow down and even needed me to install one of the curtain rails. I'm also mid way through the next curtain rail but I just haven't gotten around to finishing it. The weekday routine kicked in which means the rails are sitting on a rug in my study looking at me whilst I type this blog post sitting on the rug as I'm powering up my Chromebook (all my devices I managed to run dry battery wise tonight!)
OK on with the actual post. Lots and lots and lots of photos from the last two months of putting up curtains. Some before, some after, some during and some just because :)
I'll step you through what we have...
Photo of the bedroom with carpet when we had already put in the curtains (for that room). We had those curtains installed on day one so we had some privacy. But to put in the carpet I just tied them up a bit so they would be off the floor.
 |
| Carpet in bedroom meant curtains needed to be tied up |
Before the carpet went in the room was looking very austere...
 |
| Bedroom with curtains up and light coming through |
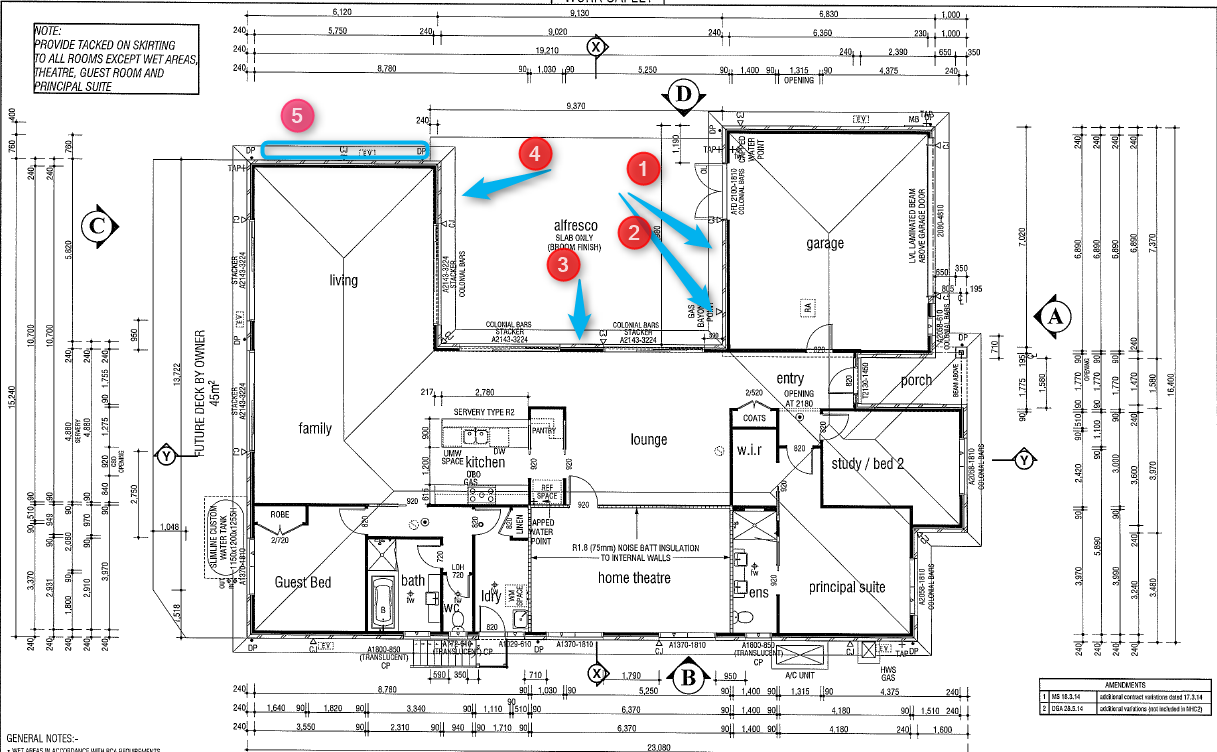
As you can see we mounted the curtain rail quite high up. We didn't think of things in time to get the hidden curtain cavity and goodness knows if Sekisui House would even know what we were asking for! We considered ceiling mounting it but i wanted a particular look so it went on the wall instead.
IKEA's curtain rail system is called Kvartal and you can put panels in or curtains. It's just a track but the reason we went with this particular system was that firstly it was a track system that was affordable, could be wall or ceiling mounted and it was able to stretch long distances... as we had big stacking doors and most other curtain tracks and poles would only go to 310cm. With stacking doors of 3224mm that would be a bit problematic!
The other thing is that we could find other blog posts and references of other people using this system. It's my need for social proof part of my brain :)
If you have been following this blog you will know that we used
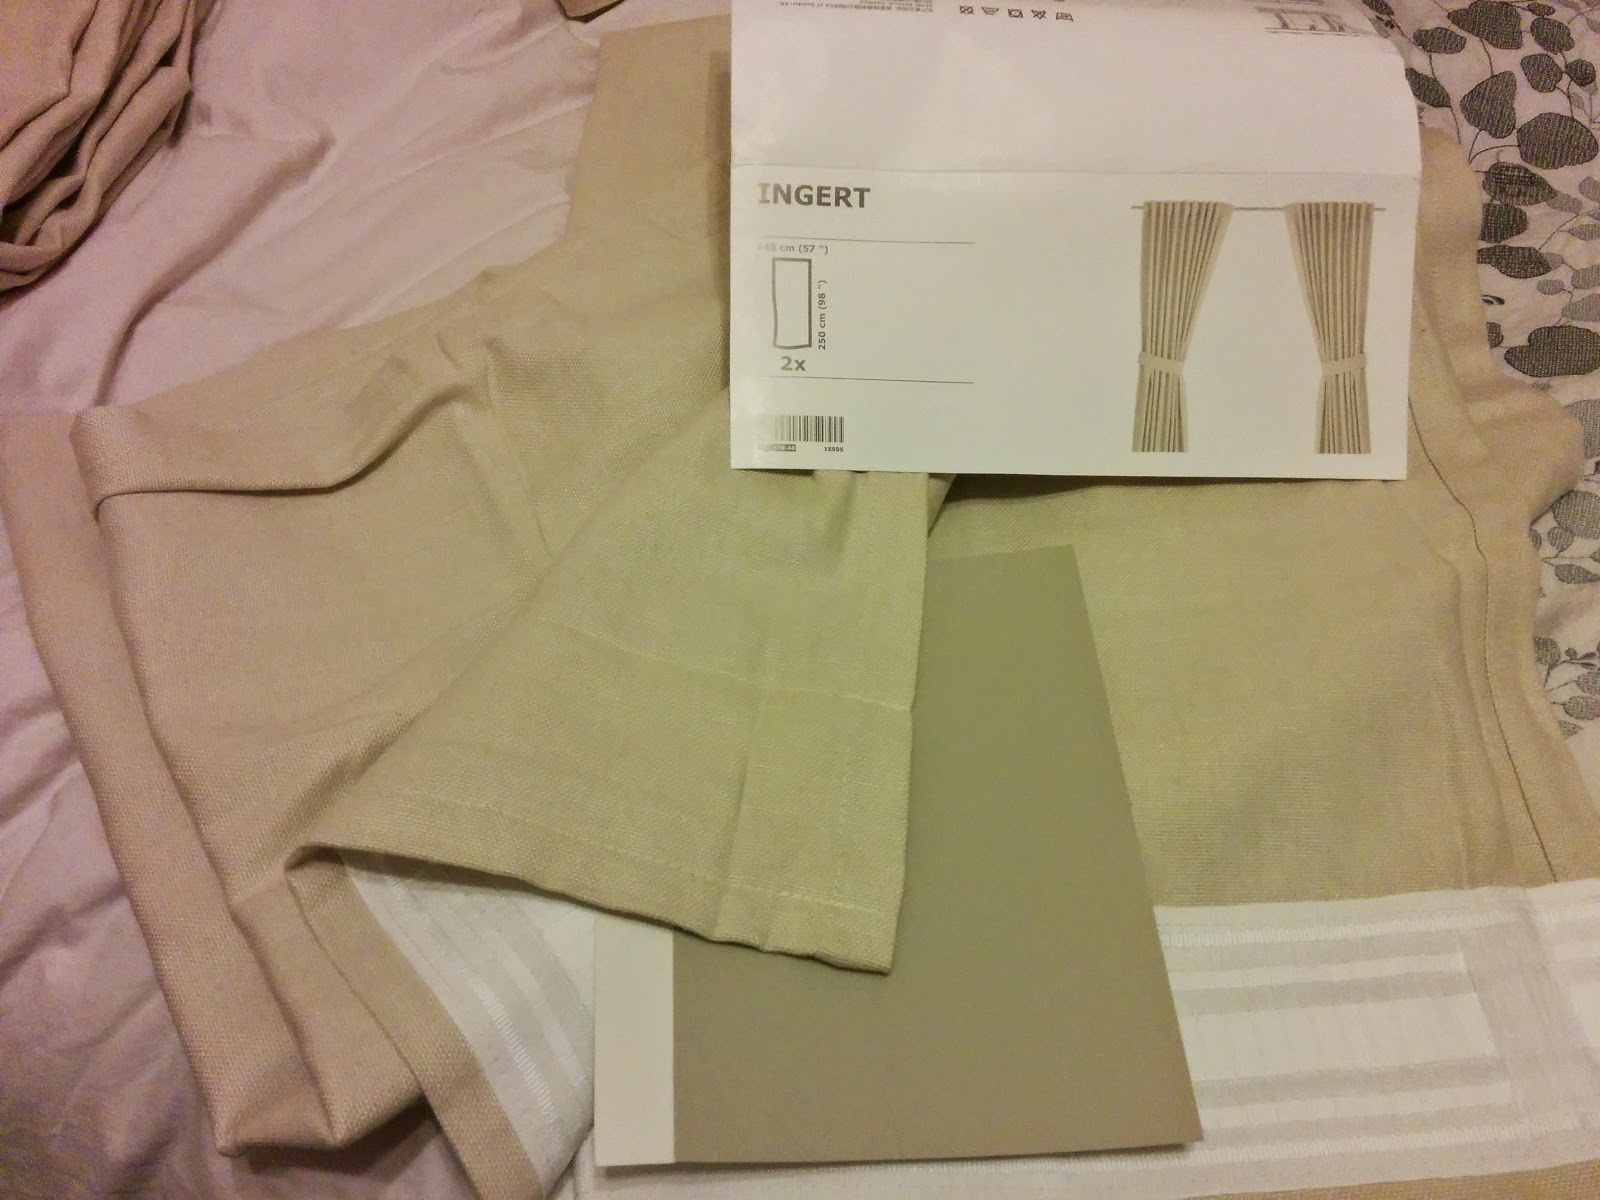
IKEA curtains too. The curtains were the very 'cheap' $40 per pack (2 curtains panels 1400mm wide 2500mm long). I had considered the Aina and the Ingert and in the end we went with Lenda. The Lenda had tab tops though... and don't work with the track system. so we chopped off the tab tops and then added the curtain header tape that IKEA has and used the Kvartal system bits.
 |
| Even tied up the curtains are fairly long |
 |
| Photo of the curtain closed |
 |
| IKEA's header tape |
At first we used curtain hooks and hung this up
 |
| IKEA curtain hooks Riktig |
I was spacing them using a box as a template... and then I realised I could just use the 'standard' spacing based on the curtain header tape tabs...
 |
| Spacing of hooks |
 |
| Spacing out using a template... |
The curtains are long. Even with the carpet not installed the curtains were on the floor so should be taken up a bit... if I can be bothered...
 |
| Curtain lengths matter. But maybe this is too long? |
The look of the curtain is important. There is the look when it's open (ie like below) and then when it's closed. There was a bit of discussion around how much 'over' (left or right) we should go past the window. Too much and the curtain 'parking' would look weird; not enough and the curtain would cover too much of the window!
 |
| Curtains opened need to sit well |
I then realised that the Riktig was giving the curtains too much or a formal look at the top. And the packs of fittings for the Kvartal system come in packs with these curtain hooks:
 |
| Hooks for the Kvartal system |
 |
| They are very plasticy! |
 |
| Hooks with the 'cars' attached |
Each of the hooks needs to be attached to the 'cars' first. This can be quite ruinious to your hands and fingers and the 'cars' have a round loop which is fixed and needs to be locked together with the hook. Then hook these onto the curtain header tape. (If you use the Riktig you can put these on the curtain and the cars onto the track and just hook each onto the car's loop... it makes more sense when you are doing it ;)
Once on the rail/track it will look a bit messy! But OK ish. I've since learned there is a stiffening tape I could have put in between the header tape and the curtain. But if I did that I could probably have purchased a different header tape! The $3 header tape from IKEA was more than adequate for my needs...
 |
| Messy header at the top |
 |
| From underneath looking at the curtain rail |
 |
| Curtain rail up close... look at that silver peeping out! |
We used the curves available in the rail system to finish rather than having it just end... We had to saw the corner curves to fit as they are designed for the 3 track bracket and not the smaller track system spacing bracket we had.
You can see the curve up close here:
 |
| Peeling back the curtain to view |
You may have noticed a colour change in the track. Nope you aren't seeing things, it's black. But the Kvartal system only comes in the silver colour. Which is way too modern for us! So we made them black. Here are a few photos of the black coloured rails:
 |
| We went high with the rail but anything from halfway up between the cornice and the window would be fine... |
One of the massive stacking door widths that we covered with a curtain. Each of these are 2.5 panels of curtains each new panel. So this curtain had 2.5 packs of curtains to make it up. Approx $100 of curtain plus the header tape and making it up...
 |
| Another angle of the stacker doors |
Closed up... the curtains are very translucent but aren't at all sheer. It's kinda meant to look linen like. Without the cost of linen.
 |
| Curtains closed from the inside |
And from outside...
 |
| Curtains from the outside. |
I have this pet hate for vertical blinds. Maybe because ours would inevitably break and we had these plasticy baby blue ones. Urgh. Just brings back bad memories. But the worst thing is what they look like from the outside. So these curtains even when unevenly spaced are a lot more soothing in my view.
 |
| Curtain in the evening... |
So we made all the rails black. It looked so much better. Even the home theatre which was going to be just the silver rails went black in the end.
And it just needed two cans of spray paint. Here are some photos of when we painted them. Didn't take long at all. Maybe 1 hour of spraying? (and me running out to get another can of spray paint!)
We used the boxes from our floor boards to prop them up. And since we have no driveway or landscaping we just did it on the dirt outside. And it wasn't a windy day which helped!
 |
| painted rails |
 |
| black painted rails |
 |
| Brackets also got sprayed |
We put them together to spray paint them closely.
Here's an action video of them being sprayed...
 |
| Video: spraypainting IKEA Kvartal curtain rails black |
I wonder if we can use the spraypaint to create some artwork? Here's what happens when you remove the brackets from the box...
 |
| Artist rubbish |
A can of the spray paint we used. We didn't prime just sprayed this on. Will likes it. Covered better than he expected it would.
I bought a dark brown and a black. We used this black for them (Canyon Black). The dark brown will be repurposed for something else.
Each can was around $11 or $12 from Bunnings. (We used about 1.5 cans for all the rails).
btw we have spray painted other silver colour things in the past. Light fittings. But for those as they would get warm we used Pot Belly Black. Designed for spraypainting pot belly stoves which get super hot.
 |
| Rustoleum Black Canyon 2 x paint |
Here are some photos of paint drying...
 |
| Spray painted rails drying |
 |
| Brackets all lined up and drying out |
Phew. That's the curtain story. Not quite the end as the plan is to get Pottery Barn hold backs for the curtains. And there is still a couple more to put up. But the bulk of it is up and there.
If you want to read back about the curtain story and how much it cost etc you can look at some previous posts about curtains from this blog via the
curtain label.


Comments
Post a Comment